

Testimonial widget: the 4 widget types, the performance data per type, the 5 features to evaluate, and the 3 mistakes when implementing
You have 32 testimonials. You pasted them into your homepage by hand. Now you need to update them. You have to edit the homepage code, change the testimonials, save, push live. Every update means touching code. You wonder if there is a better way.
There is. It is called a testimonial widget: a small piece of embedded code that pulls testimonials from a central source and renders them anywhere on your site.
This guide covers what a testimonial widget is, the 4 widget types, the performance data per widget type, how widgets differ from manual placement, the 5 features to evaluate when choosing a widget, and the 3 mistakes to avoid. For the broader placement taxonomy, see displaying testimonials.
What a testimonial widget is (and is not)
A testimonial widget is an embeddable component that renders customer testimonials on your site. The widget connects to a testimonial source (your collection platform, a CSV file, a public API). The widget updates when the source updates. No code changes needed.
A widget is not a static image of testimonials. Static images do not update. They look old within months. They also do not inherit your brand styling. They look pasted on.
A widget is not a plugin. Plugins are installed into your CMS. Widgets are usually standalone JavaScript snippets that work in any HTML context (WordPress, Webflow, Shopify, custom sites). Plugins require CMS access. Widgets do not.
A widget is also not a manual script tag. Manual script tags render testimonials but they do not update. The right widget is dynamic, brand-customizable, and CMS-agnostic.
The 4 widget types
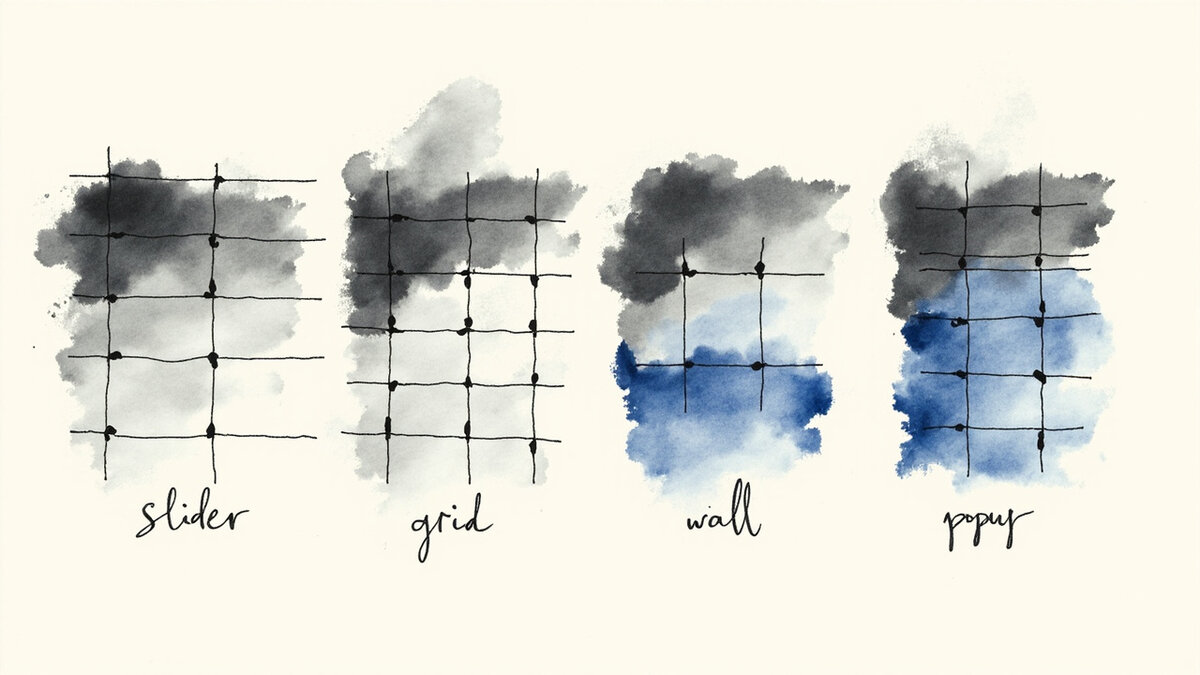
There are 4 widget types. Each serves a different placement and use case.
Type 1: Slider. A horizontal strip showing 1 testimonial at a time, rotating automatically or via arrows. Used at the top of pages (homepage hero, footer). Works for scan-mode visitors who want to browse without committing to a long read. The slider can include 5-10 testimonials in rotation. For the carousel implementation specifically, see testimonial carousel.
Type 2: Grid. A 2×3 or 3×3 grid showing 6-9 testimonials at once. Used on dedicated testimonial pages and pricing pages. Works for visitors who want depth. Each card shows a quote, name, and photo.
Type 3: Wall (or “Wall of Love”). A full-page layout with all testimonials stacked vertically. Used for the dedicated /wall-of-love/ URL. Works for visitors who want to read everything. The page often becomes a destination for prospects.
Type 4: Popup or slide-out. A small card that appears after a delay or on scroll. Used on landing pages and high-intent placements. Works for capturing attention without taking over the page. For the popup implementation specifically, see testimonial popup.
The 4 types map to different placements. The right type depends on where the testimonial appears on the page and how the visitor consumes the page.
Performance data per widget type
The conversion data on widget types is more consistent than most marketers expect. The 4 patterns below hold.
Pattern 1 (Slider): Best for hero placements. Lifts homepage CTA conversion by 5-15% compared to no testimonial. The slider pulls attention to social proof without taking over the page. Visitors absorb the proof in scan mode.
Pattern 2 (Grid): Best for pricing and product pages. Lifts conversion by 8-20% compared to no testimonial. The grid shows depth. Visitors evaluating a purchase want to see multiple perspectives before deciding.
Pattern 3 (Wall): Best as a destination page. The wall of love URL becomes a referral asset. Prospects share the link with colleagues. The conversion impact is indirect (it builds trust over time, not on a specific page).
Pattern 4 (Popup): Best for high-intent landing pages. Lifts conversion by 5-12% but increases bounce risk (the popup can feel intrusive). Test popup timing and frequency carefully. A popup that appears after 30 seconds performs better than one that fires immediately.
The 4 patterns show that no single widget type is best for all placements. The right widget is the one that matches the placement and the visitor’s reading mode.
How widgets differ from manual placement
Manual placement is copy-pasting testimonials into HTML. Widgets are embedded scripts that pull from a central source. The 5 advantages of widgets below explain the shift.
Advantage 1: Centralized updates. Add a new testimonial to the source. The widget updates on every page that uses it. Manual placement requires editing each page.
Advantage 2: Consistent design. The widget renders consistently across pages. Manual placement can drift in styling as the team edits different pages.
Advantage 3: A/B testing. Widgets can be configured for A/B tests (show testimonials vs no testimonials, slider vs grid). Manual placement is harder to test cleanly.
Advantage 4: Analytics. Widgets track impressions, clicks, and conversions. The data tells you which testimonials drive the most engagement. Manual placement does not produce analytics.
Advantage 5: Schema markup. Most widgets include Schema.org Review markup automatically. The markup helps SEO and AI search visibility. Manual placement requires adding the markup by hand (and getting it wrong is common).
The 5 advantages explain why widgets are standard practice once testimonials reach 10+ entries. Manual placement is fine for early-stage collections. Widgets become essential at scale.
The 5 features to evaluate when choosing a widget
The 5 features below differentiate a basic widget from a production-grade one. Use them as the evaluation criteria.
Feature 1: Schema markup support. The widget must add Schema.org Review or AggregateRating markup automatically. Without it, the testimonials do not produce SEO or AI search visibility. Ask the vendor for a sample page and view the source code to verify.
Testivo and similar platforms include Schema.org Review markup automatically on all plans, which makes the SEO and AI search benefit default rather than an upgrade.
Feature 2: Brand customization. Colors, fonts, layout, card design. The widget must match your site brand. Generic-looking widgets undermine the trust they are trying to build.
Feature 3: Performance. The widget must not slow down your page. A slow widget increases bounce rate. Ask for performance benchmarks. Lazy load where possible.
Feature 4: Mobile responsiveness. The widget must look good on phones. Many widgets are designed for desktop and break on mobile. Test on a phone before committing.
Feature 5: Source flexibility. The widget should pull from multiple sources (the platform’s own database, a CSV, an API). Lock-in to one source is risky if the platform raises prices.
The 5 features are non-negotiable for production use. A widget missing any of them becomes a liability.
The 3 mistakes when implementing widgets
The 3 mistakes below show up in 60% of first widget implementations. Avoiding them preserves the impact.
Mistake 1: Installing the widget without testing it. The widget loads but the testimonials do not appear correctly. Visitors see empty cards. Test the widget in a staging environment before deploying to production. Use tools like BrowserStack or your own QA process.
Mistake 2: Showing too many widgets on one page. A page with 3 testimonials and 4 testimonials sliders becomes visual noise. Pick one or two placement areas per page. The page should not look like it is selling the customer.
Mistake 3: Forgetting the schema markup. The widget renders visually but does not include the JSON-LD markup. The testimonials do not produce SEO value. Verify the markup with a tool like Google’s Rich Results Test.
Where widgets work and where they do not
Widgets are not the right choice for every testimonial placement. The 4 placements below are where widgets shine. The 4 placements below that are where widgets do not work.
Works for: Homepage hero, pricing page, dedicated /testimonials/ page, blog post sidebar, sales deck slide.
Does not work for: Email campaigns (no JS), PDF case studies (no JS), ads (no JS), some ecommerce platforms with strict iframe restrictions.
For the does-not-work placements, use screenshots of the widget or paste the testimonials as styled HTML blocks. The dynamic update feature is lost. The visual presentation is similar.
How widgets change over the customer journey
The widget strategy evolves as the testimonial library grows. The 4 stages below describe the typical evolution.
Stage 1 (10 testimonials): One widget on the home page. The widget shows the strongest 5 testimonials in rotation. The placement is the footer or hero section.
Stage 2 (30 testimonials): Multiple widgets across the site. The home page widget, pricing page widget, dedicated testimonials page, and product page widgets. The widgets are coordinated to show different testimonials at different placements.
Stage 3 (100 testimonials): Multiple widget types per page. The home page has a slider, the pricing page has a grid, the dedicated page has a wall. The library is large enough to support variety.
Stage 4 (500+ testimonials): Personalized widgets per audience. SaaS visitors see SaaS testimonials. Ecommerce visitors see ecommerce testimonials. The widget is segmented by visitor type or source.
The 4 stages describe a typical evolution. Most businesses move through them as the testimonial program matures.
The 3 widget deployment patterns
There are 3 deployment patterns for widgets. Each has different technical requirements.
Pattern 1: Single-page snippet. The widget is a JavaScript snippet (typically 10-30 lines of code) embedded directly in the page HTML. The snippet loads the testimonials from the source. This is the simplest deployment pattern and works for any HTML page.
Pattern 2: Tag manager. The widget is deployed via Google Tag Manager or similar. The deployment is centralized. Updates to the widget code happen once and propagate to all pages. This pattern works for sites with many pages and a tag manager already in place.
Pattern 3: Plugin or extension. For CMS platforms (WordPress, Shopify, Webflow), the widget can be installed as a plugin or extension. The plugin adds the widget to specific pages via the CMS UI. This pattern works for users who prefer UI-based tools over code.
The 3 patterns cover most deployment scenarios. Choose the one that matches your team’s preferences and the site’s architecture.
What the schema markup actually does
Schema markup is the invisible layer of the widget. The 4 effects below explain why it matters.
Effect 1: Google rich results. Pages with proper Review or AggregateRating schema can show star ratings in Google search results. The star ratings lift CTR by 10-25% compared to plain results.
Effect 2: AI search citations. ChatGPT, Perplexity, Google AI Overviews, and other AI search engines pull from schema-marked content to cite customer opinions. Pages without schema are rarely cited in AI search results for testimonial queries.
Effect 3: Aggregate trust signals. Schema markup produces aggregate trust signals (4.6 stars from 247 reviews) that browsers and aggregators can read. The signals appear in tooltips, browser extensions, and some ad platforms.
Effect 4: Per-testimonial discoverability. Each individual testimonial becomes indexable in its own right. Visitors searching for “[product] + testimonial” can land on the specific page with the testimonial.
The 4 effects explain why schema markup is non-negotiable. A widget without schema is a widget that does half the work.